Dockerize And Deploy Django Project With Github Actions
18 Jul 2024
. category:
.
Comments
Overview
In this blog, we will learn to dockerize a django project and deploy it in Ec2.
Project Setup
first install a django project
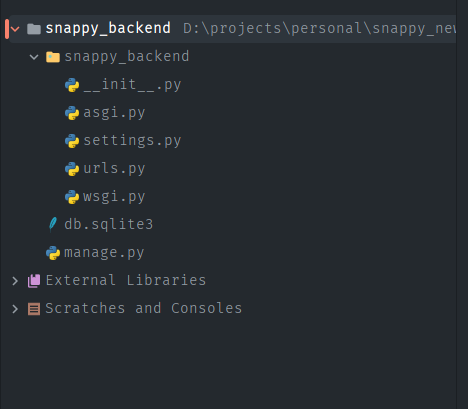
The structure should look sth like:
add dockerfile
FROM python:3.10-alpine

ENV PYTHONUNBUFFERED=1

RUN apk update \
    && apk add --no-cache --virtual .build-deps \
    ca-certificates gcc linux-headers musl-dev \
    libffi-dev jpeg-dev zlib-dev libc-dev \
    postgresql-dev cargo

RUN pip install --upgrade pip

# Create group and user
RUN addgroup test_user && adduser -D test_user -G test_user -h /home/test_user

ENV HOME /home/test_user

ENV APP_DIR ${HOME}/myproject

WORKDIR ${APP_DIR}

ADD requirements.txt ${APP_DIR}/

RUN pip install --upgrade pip setuptools wheel
RUN pip install -r ${APP_DIR}/requirements.txt

COPY ./ ${APP_DIR}

RUN chown -R test_user:test_user ${APP_DIR}

USER test_user

EXPOSE 8002

ENTRYPOINT sh -c "python manage.py runserver 0.0.0.0:8002"
add docker compose file.
version: '3.10'

volumes:
  dbdata:

networks:
  localhost:
    driver: bridge

services:
  api:
    build:
      context: .
    ports:
      - 8002:8002
    volumes:
      - .:/home/test_user/myproject
    container_name: myproject_container
    depends_on:
      - db
    links:
      - db
    networks:
      - localhost

  db:
    image: postgres:alpine
    environment:
      - POSTGRES_DB=${DB_NAME}
      - POSTGRES_USER=${DB_USER}
      - POSTGRES_PASSWORD=${DB_PASSWORD}
    container_name: myproject_db
    ports:
      - 5435:5436
    volumes:
      - dbdata:/var/lib/postgresql
    networks:
      - localhost
Now after doing so, you can navigate to the project main folder, and hit
docker comopse up --build
This command builds up the docker image and run the container.
Once this runs on your local, you can push your project to VCS.
After pulling the changes from github, clone the project. After navigating to the project folder, you should install docker with instructructions here and docker-compose with this.
Configure Nginx Permission
You should install then install nginx with the following command if you are using ubuntu.
sudo apt update
sudo apt install nginx
You can then navigate to the folder:
/etc/sites-available/
and create a new file with a new conf file that can be of any name.
Update the file content with the following:
upstream myapp {
    server 127.0.0.1:8000;  # Docker container running on port 8000
}

server {
    listen 80;
    server_name your_domain_or_ip;  # Replace this with your domain or public IP

    location / {
        proxy_pass http://myapp;
        proxy_set_header Host $host;
        proxy_set_header X-Real-IP $remote_addr;
        proxy_set_header X-Forwarded-For $proxy_add_x_forwarded_for;
        proxy_set_header X-Forwarded-Proto $scheme;
        proxy_redirect off;
    }
}
Now, enable the new configuration with the following command:
sudo ln -s /etc/nginx/sites-available/myapp.conf /etc/nginx/sites-enabled/
Configure Docker Permission
Before building with docker, we should first configure the permission, since right now by default, you would get a permission error like this:
 ,
check if docker group already exists with the following command:
,
check if docker group already exists with the following command:
getent group docker
if the group does not exist, create a group using:
sudo groupadd docker
Add user to the group
sudo usermod -aG docker $USER
Build Project with Docker
Now go the project folder in your remote app, navigate to the project folder and hit,
docker-compose up --build
To run any django related commands:
docker-compose exec api sh
Auto Deploy the chnages whenever there is a push in master.
name: Deploy on Push to Main

on:
  push:
    branches:
      - main

jobs:
  deploy:
    runs-on: ubuntu-latest

    steps:
      - name: Set up SSH agent
        uses: webfactory/[email protected]
        with:
          ssh-private-key: $

      - name: Deploy to EC2
        run: |
          ssh -o StrictHostKeyChecking=no $@$ << 'EOF'
            cd /var/www/snappy_backend/
            python manage.py migrate
            sudo git pull origin main
          EOF
Above we are using the github action to pull any changes in the virtual environment whenever there are new changes in master branch. You would need three values here:
SSH_HOST: public ip or the domain of the virtual instance
SSH_USER: user of the virtual environment (ubuntu)
SSH_PRIVATE KEY: key from the .pem file
Possible Improvements
1) Multi Staged builds.
2) Having separate deployment scripts for staging and production.
3) Use AWS Cli tool to better manage the whole deployment process.
4) Run test and linter before deploying.
5) Also integrate Nginx and certbot in the docker container as well.
Here is the github repo for further reference.

Jyoti is trying to be an awesome human being. In spare time he loves to eat and go to new places.